As AI tools become more prevalent on endpoints, how do we ensure they don’t get their virtual hands on sensitive files? In this blog post, I’ll walk through a hands-on lab using Microsoft Purview Endpoint DLP to block a Foundry Local AI model from accessing a classified document on a Windows 11 device. I also discuss options for deploying the themes covered in production.
Scenario: We have a document that we know contains sensitive data on a Windows 11 device, labelled as Confidential. We have another document on the same device that contains sensitive data and is not labelled. We’re going to use Microsoft Foundry Local (a CLI tool for running AI models locally) to attempt to process that file. With the right Restricted App policy in Purview, the AI model’s process will be blocked from opening the file. The policy settings can also be set to only Audit so that Endpoint DLP monitors the sensitive data usage.
We’ll set up everything from scratch: enabling Endpoint DLP, tagging a file as sensitive, adding Foundry CLI as a restricted app, creating the DLP policy, and then testing the block while capturing logs and evidence. Below is a 2 minute video showing what the user experience is like:
Let’s get started!
Pre-requisites
Licensing:
- Microsoft 365 E5 or E5 Compliance license (for Endpoint DLP).
- Audit enabled in Microsoft Purview (usually on by default in E5 tenants).
Device:
- Device running Windows 11 Pro, Enterprise or Education
User Rights:
- Local administrator rights on the device (to run onboarding scripts and install Foundry CLI).
- Purview DLP admin permissions in the tenant (to configure DLP policies and restricted apps).
Step 1: Onboard Your Windows 11 Device to Purview Endpoint DLP
First things first – your endpoint (the Windows 11 PC) needs to be known to Microsoft Purview’s DLP service. This is done by onboarding the device to Microsoft Defender for Endpoint, which in turn lights up Purview Endpoint DLP capabilities. If you’ve already got the device in Defender for Endpoint, you’re likely set. If not, here’s how:
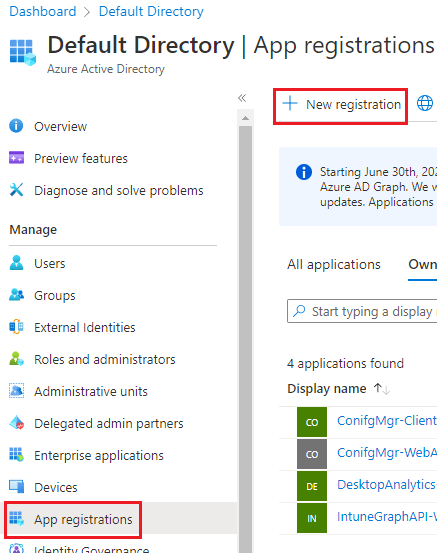
- Generate an onboarding package: In the Purview portal (purview.microsoft.com), go to Settings > Device onboarding > Onboarding. Choose Windows 10/11 and download the onboarding script or the MSI package. (For Intune-managed environments, you can download an onboarding policy for MEM.)

- Run the onboarding script: Copy the script to the Windows 11 PC (or use Intune to deploy). Run it as administrator. It will configure the device and register it with your tenant’s Defender for Endpoint. A reboot might be required.
- Verify onboarding: After a few minutes, check the Devices list in the In the Purview portal, go to Settings > Device onboarding > Devices. You should see your device listed as onboarded. You can also run
sc query sensein an elevated command prompt on the PC to see if the Defender for Endpoint sensor (“Sense” service) is running – a good sign.
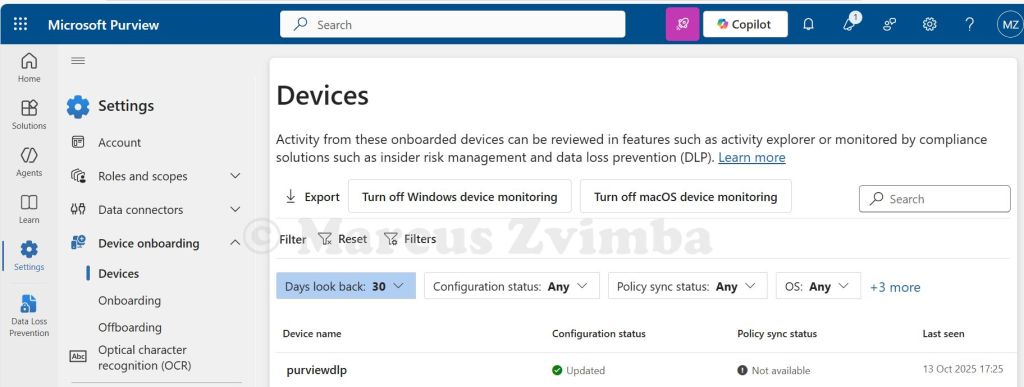
If the device shows up and is active, congrats – you now have an endpoint that Purview can protect with DLP policies. (“Enrolment” complete! ✓)
Note: Ensure the Windows user you’ll test with has an E5 Compliance licence assigned (since Endpoint DLP is an E5 feature). Also, enabling Auditing in Purview (via purview.microsoft.com > Solutions > Audit) is required so that all actions get logged. In an E5 tenant, audit is typically on by default.
Step 2: Prepare a Sensitive File to Protect
We need a file that our DLP policy will treat as sensitive. This could be any document containing confidential info or explicitly labelled as such:
- Create a test file: For example, I opened Notepad and entered some dummy personal data:
Employee Salary List (Confidential)

Name: John Doe – Salary: £70,000

Credit Card: 4111 1111 1111 1111
Save this as SensitiveData.txt on the device. The credit card number will trigger built-in DLP detectors.
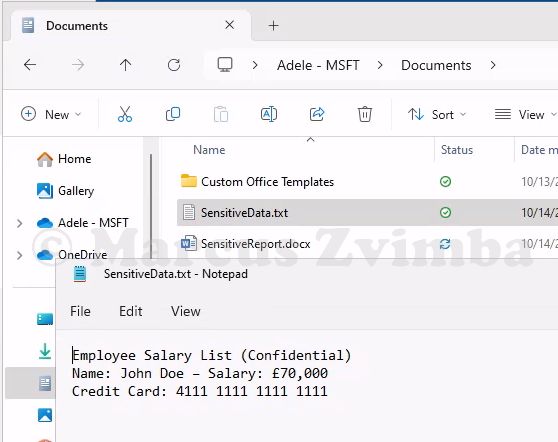
- Create a second test file and apply a sensitivity label: Copy the text into a Word document but remove the credit card number. If you have sensitivity labels published (like “Confidential” or “Highly Confidential”) we can use these, otherwise you will need to publish a new Purview Information Protection sensitivity label. I saved a copy as SensitiveReport.docx and applied my “Confidential” label.
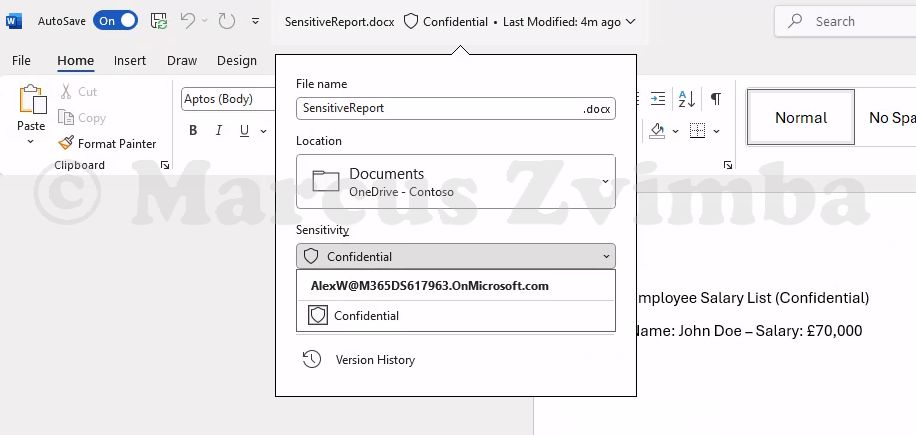
Now we have two files that are definitely sensitive. Purview can identify them either via the sensitivity label metadata or by scanning the content (e.g. detecting that 16-digit number as a credit card number).
Step 3: Mark Foundry Local CLI as a Restricted App
This is the pivotal configuration: telling Purview that the Foundry Local CLI is not allowed to touch protected content. Foundry Local is invoked via the foundry command. Under the hood, that’s an executable (on Windows it is foundry.exe). We’ll add that to the restricted apps list:
- In the Purview portal, go to Settings > Data Loss Prevention > Endpoint DLP Settings > Expand Restricted apps and app groups.

Click Add an app:
- App name: Give a friendly name like “Foundry Local CLI”.
- Windows executable name: This must match the process name. In this case, type
foundry.exe(the CLI later installed via winget uses this command). No need for a path, just the exe name. - (No need to fill Mac info for our Windows scenario.)
- Auto-quarantine: Leave this unticked. (Auto-quarantine is more for things like Dropbox apps – not needed here, we just want to block.)
Hit Save. You should now see “Foundry Local CLI (foundry.exe)” in the Restricted apps list.
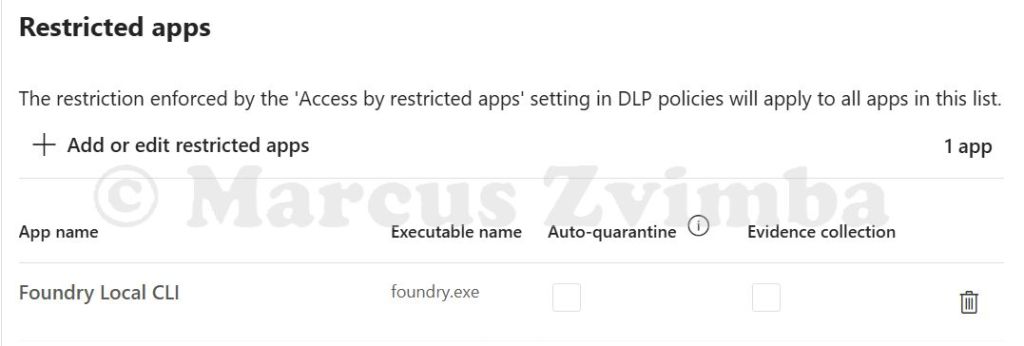
Ensure the entry is there. The default behaviour for restricted apps (unless overridden by policy) is to audit. We will enforce the block via policy next. The settings page will look like this:
Now Purview knows about the Foundry CLI. Next, we’ll configure the actual DLP policy rule that leverages this.
Step 4: Create a DLP Policy to Block Restricted App Access
We’ll create a custom DLP policy that targets our sensitive info and blocks any restricted app (like foundry.exe) from accessing it. Here’s how:
- In the Purview portal, go to Data Loss Prevention > Policies > Create Policy > Data stored in connected sources.
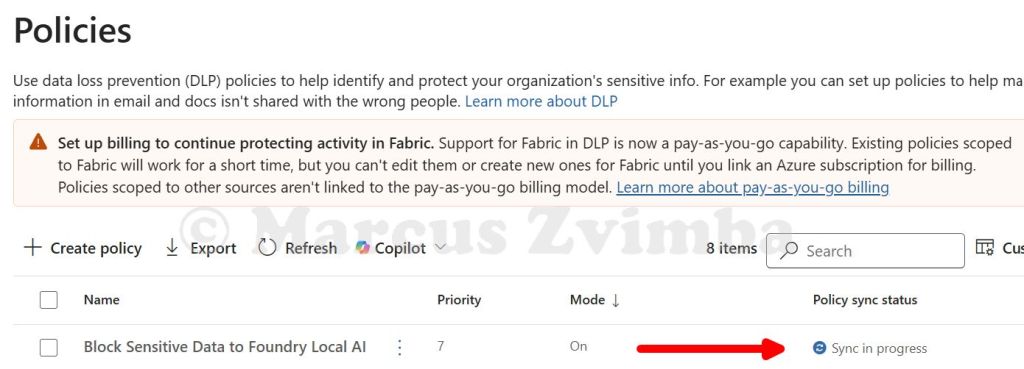
- Choose Custom policy. Name it something like “Block Sensitive Data to Foundry Local AI”.
- On Assign admin units select Next.
- On Locations: Tick Devices (we want this on endpoints), and untick all the other options.
- To the right of the ticked Devices > Edit the scope, IMPORTANT: Only apply this to your test groups
- Name the rule “Sensitive content” and add conditions.:
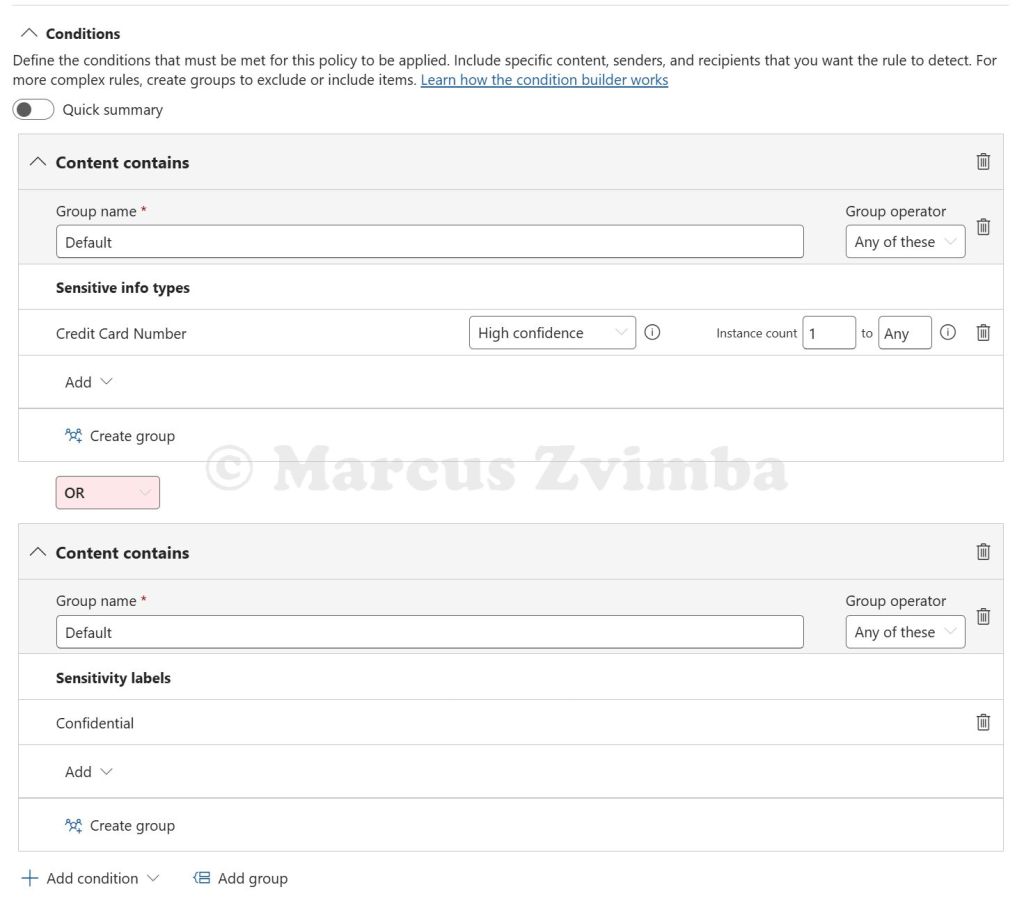
- Click Add condition > Sensitive info types. Pick “Credit Card Number” and set it to at least 1 instance. (Our file has one, so that’ll hit.) You could also add “UK National Insurance Number” or whatever fits your content. Each added type is an OR by default (any one matching triggers the rule).
- Additionally, add Sensitivity label as a condition. Select the label Confidential. Now the rule will trigger if the file has that label OR matches an SIT. You can have multiple conditions; by default it’s “Any condition matches”.
- Tip: If using multiple, ensure to group accordingly if needed. In our case, Credit Card OR Confidential label is fine.
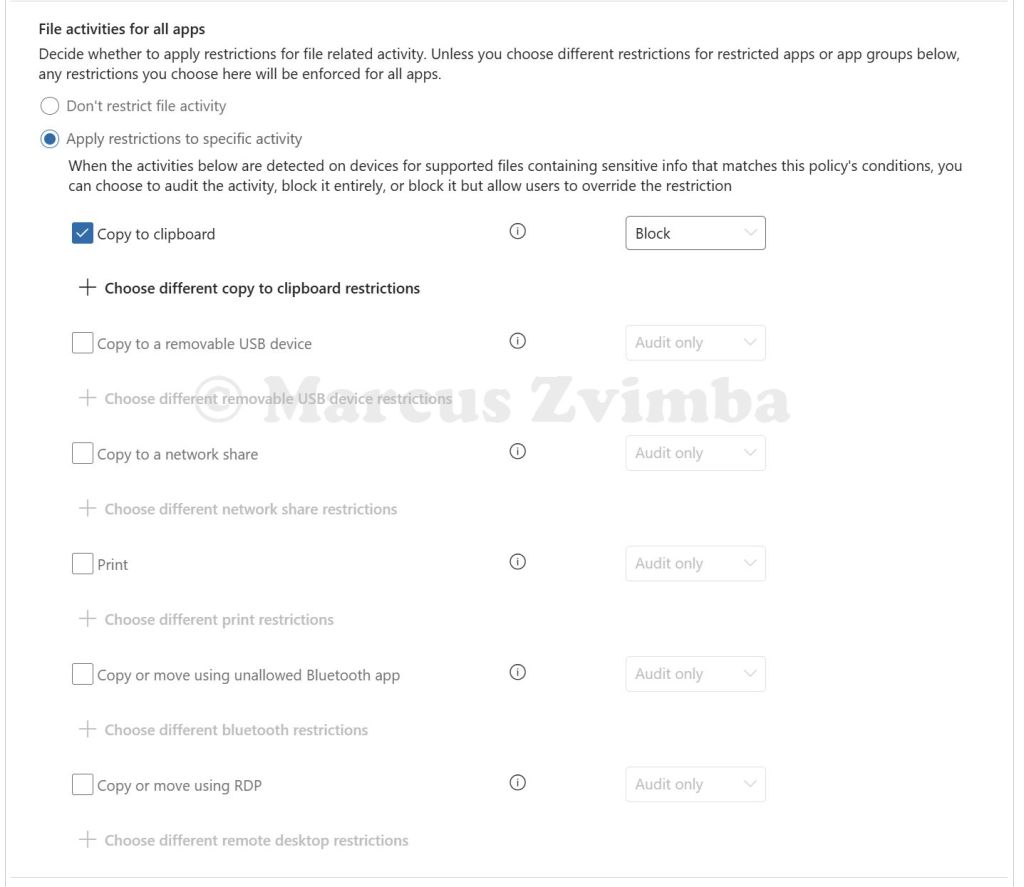
- Scroll to Actions > Select Audit or restrict activities on devices.
- set File activities for all apps to Apply restrictions to a specific activity
- Select Copy to clipboard > Block. Untick all the other options. I’ll explain why we need this later in the post.
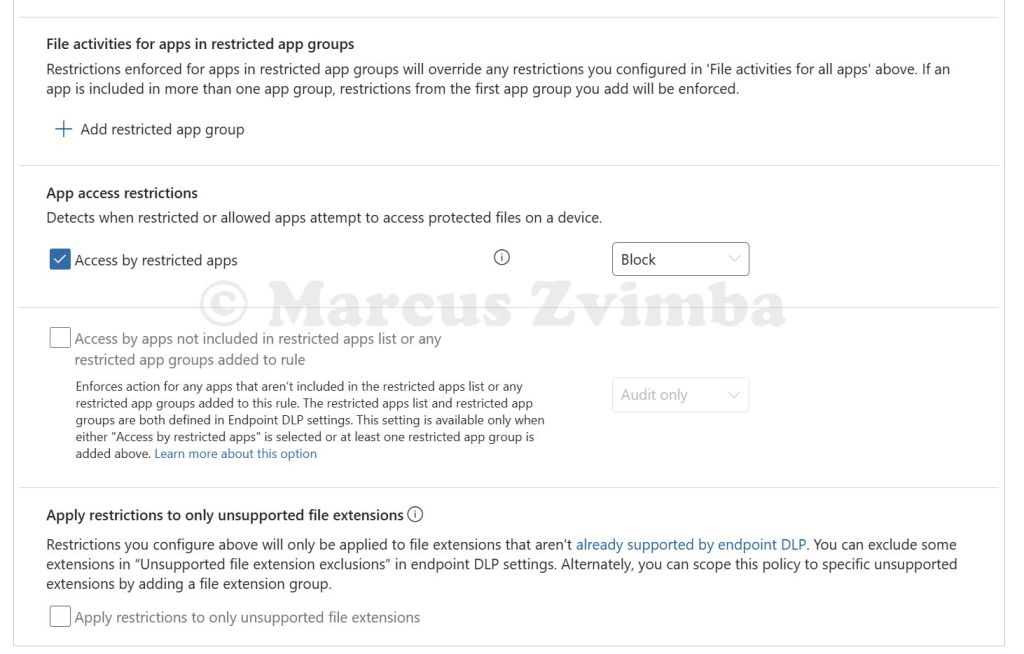
- Under App access restrictions > Tick Access by restricted apps > Select Block. This corresponds to any app we put in the restricted list trying to open the file.
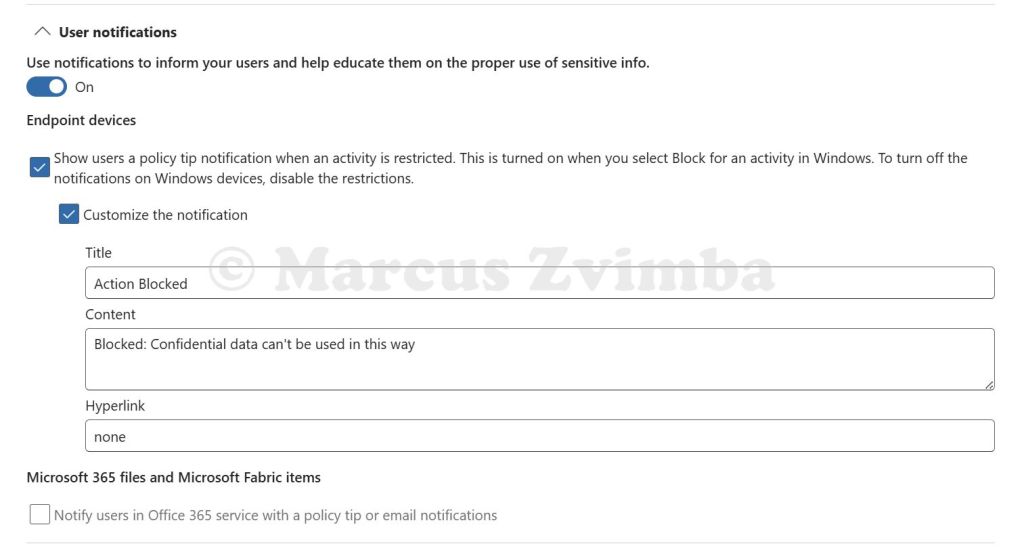
- Toggle “User notifications” on for endpoint. This ensures the user sees a popup when the policy triggers. You can customise the message if you like (“Blocked: confidential data can’t be used with this app”) but it’s optional.
- For the lab, I toggled on Alerting for this rule. This way, when it triggers, an alert is generated in Purview (useful to demonstrate logging). Set it to alert every time or just the first time – up to you.
- Choose Turn the policy on immediately (not simulation mode) since we want the block to actually happen now. Click Submit and let it publish.

It can take a long time for policy changes to take effect, anywhere from 1 to 24 hours. The DLP agent on the device will download the new policy in the background. So, time for a break!
Step 5: Run Foundry Local CLI and Attempt to Access the File
Time for the fun part – will our AI model be thwarted by DLP? Let’s simulate a user (us) trying to feed the sensitive file into the local AI model:
- Install Foundry Local on the Windows device by running the below command
winget install Microsoft.FoundryLocal
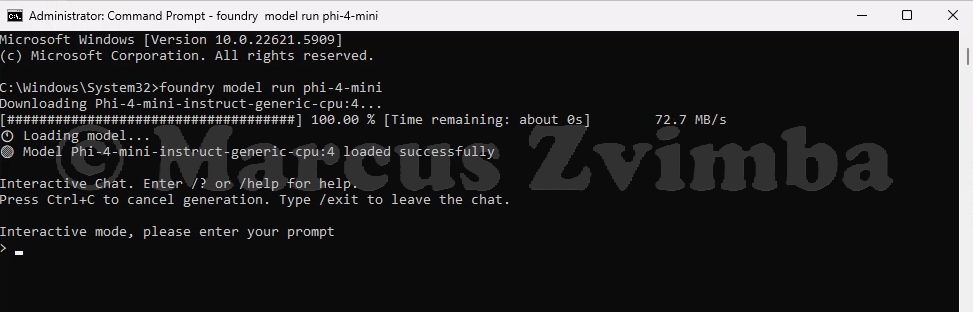
- Open Command Prompt (as the regular user, not admin). Start a model by running a command:
foundry model run phi-4-mini
This tells Foundry Local to run a small instruction-following model (phi-4-mini). It will download the model if not already cached, then start an interactive session
You’ll see some logs of model loading, then a prompt like Foundry > indicating it’s ready for input.
Press Ctrl + C to exit the foundry prompt
Now we will test our DLP policy:
- Test A: Redirect the unlabelled file into Foundry: Type the command (replacing the file location with your file’s location):
foundry model run phi-4-mini < "C:\Users\AlexWilber\OneDrive - Contoso\Documents\SensitiveData.txt"
This uses shell redirection to pass the file content as input to the model.
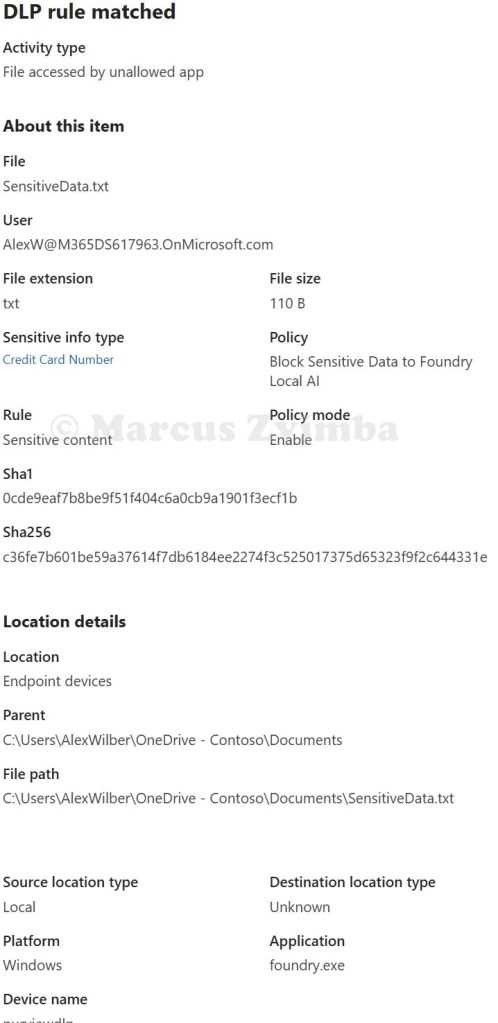
- Result – Blocked! The command line reported that Access to the file is blocked. I immediately got a Windows notification in the bottom-right: “Blocked: Confidential data can’t be used in this way”. Bingo! The foundry.exe process was prevented from reading
SensitiveData.txt. - In the Purview portal > Solutions > Data Loss Prevention > Explorers > Activity Explorer > Search for an activity called ‘DLP rule matched‘. Open the match for your device and the file you tried to access. Below are the details for this blocked action

Test B: Redirect the labelled file into Foundry: Type the command (replacing the file location with your file’s location):
foundry model run phi-4-mini < "C:\Users\AlexWilber\OneDrive - Contoso\Documents\SensitiveReport.docx"
This uses shell redirection to pass the file content as input to the model.
- Result – Blocked! The command line reported that Access to the file is blocked I immediately got a Windows notification in the bottom-right: “Blocked: Confidential data can’t be used in this way”. The foundry.exe process was prevented from reading
SensitiveReport.docx. - In the Purview portal > Solutions > Data Loss Prevention > Explorers > Activity Explorer > Search for an activity called ‘DLP rule matched‘. Open the match for your device and the file you tried to access. Below are the details for this blocked action


Test C: Copy/Paste: We know that foundry.exe cannot read the files directly. But what if your user wanted to copy and paste the sensitive content in to the AI model’s prompt? To prevent this we have used a sledgehammer. Due to a limitation of Purview Endpoint DLP, there is no Purview option to Block pasting data into foundry.exe when it is accessed via the command line. We must block the data being copied into the clipboard in the first place.
Suppose we had a local application that uses a local AI model under the hood, like a chat bot. That app is accessed via a web front end using Edge browser. We could set our DLP policy to block 'Paste to supported browsers' so that we don't have to completely block the ability to Copy the data to the clipboard.
Remember in our DLP policy we blocked Copy for all apps? Well, this is the sledgehammer! No application on this device will be able to copy our sensitive data in to the clipboard (the Credit card number from the unlabelled text file or data from the labelled Word document).
To test this, we open SenstiveData.txt and try to copy the Credit Card number. It is blocked.

We try the same with any data in SenstiveReport.docx and it is also blocked.
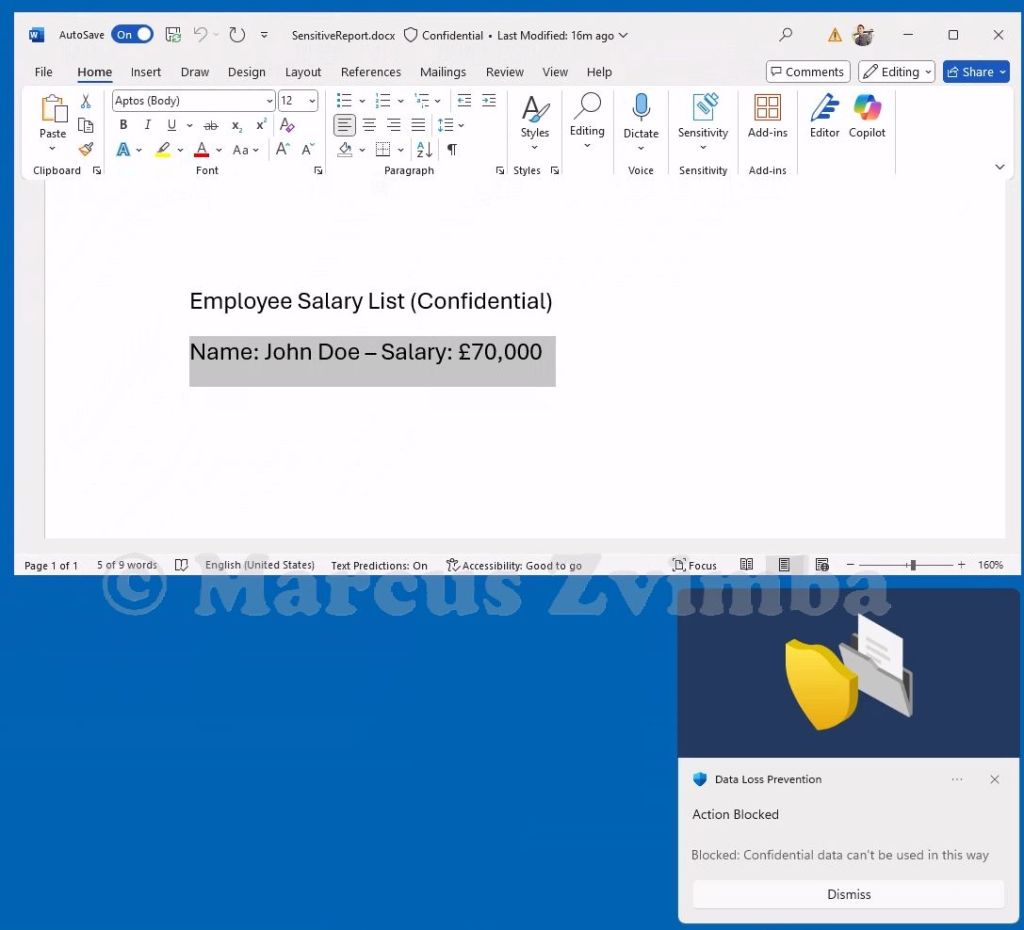
This is indeed a sledgehammer as it impacts how the user can work with data that they may have a legitimate need to copy and paste into different applications. Instead, you could use a Block with override policy setting that allows the user to proceed with the Copy after they have been warned not to use it with the local AI model.
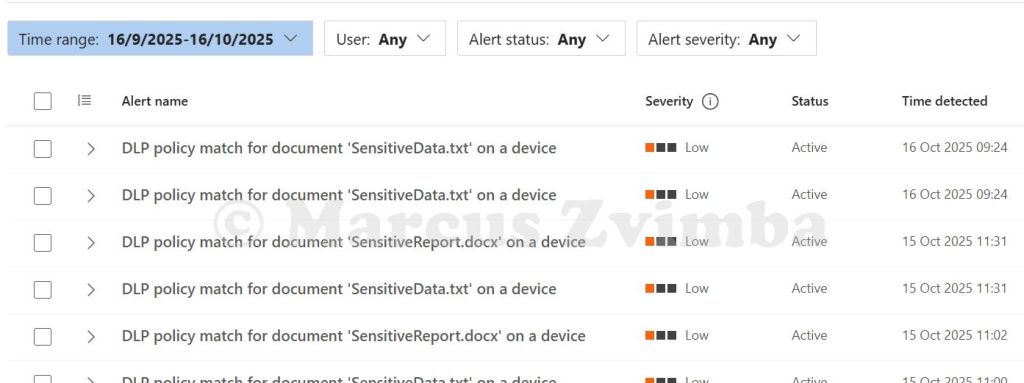
Lastly, go to Purview portal > Solutions > Data Loss Prevention > Alerts. Here we see the Low priority alerts we configured to trigger in the DLP policy.
Additional Notes and Observations
- Foundry Local CLI specifics: Currently, Foundry’s
model runcommand doesn’t have a built-in “open file” parameter (it’s geared for interactive chat2). We simulated file input via shell redirection. - Scope of policy: We applied the policy to all devices/users for simplicity. In production, you could scope it to specific users or device groups. For instance, maybe only apply to users in a particular department initially, or exclude certain test machines.
- Audit vs Block: We went straight to blocking to demonstrate the feature. A best practice is to start with Audit mode to see how often an event would trigger. If you had run our policy in Audit, then Foundry would have received the data but the event would still be logged as “Access by restricted app (Audit)”. After confidence, you flip to Block. For a lab/demo, Block is more dramatic to show 😃.
- Limitations: This solution prevents direct file access or copying. It doesn’t cover a scenario where a user might manually re-type info or if they took a screenshot and fed that to an AI (that’s a different vector – though Purview can also block screen captures of labelled content if you disable the Copy permissions in Access Controls in the sensitivity label).
The policy does not differentiate which model is running – it blocks the Foundry CLI entirely from those files. In some orgs, you might eventually allow certain vetted models but not others; currently, the control is at the app level rather than model granularity.
Conclusion
We successfully showed that Microsoft Purview Endpoint DLP can safeguard sensitive files from being processed by a local AI model. By configuring foundry.exe as a restricted app and creating a DLP policy to block its access to classified data, the system prevented the data from ever leaving its file – the AI got nothing.
This lab mirrors real-world concerns: employees might be tempted to use powerful local AI tools (like Foundry, chat bot clients, etc.) with work data. With proper DLP controls, you can permit the benefits of AI while mitigating the risks of unauthorised use of AI with sensitive information.
If blocking is not your priority but monitoring is, then you can leverage Endpoint DLP in Audit mode which feeds alerts to the Purview portal. Then use Purview Insider Risk Management policies to detect risky behaviour, such as an application that uses local AI opening many documents that contain sensitive information when that is not normal for how the AI model was intended to be used.
Happy labbing, and stay secure while you innovate!