Introduction
Microsoft Endpoint Configuration Manager Current Branch 2103 now combines the ease of Windows 10 Servicing with the versatility of Task Sequences.
The Windows 10 Servicing node in ConfigMgr has been around for some time however many organisations have not been able to rely on it solely for workstation upgrades. Frequently Task Sequences need to be deployed to carry out the Feature Update in order to clean-up the workstation prior to upgrade or refresh Applications and Drivers to compatible versions.
Doing this carries a burden on the infrastructure. An entire OS image (~5.5GB for 20H2) needs to be stored on Distribution Points in addition to the OS image used for a bare metal OS deployment Task Sequence. Workstations need to download the entire package in order to upgrade. In reality, they do not need all of the files in the package because they already have many of them.
What if we could deploy only the files needed for the Feature Update and even allow clients to download them directly from Windows Update?
Well, now we can! ConfigMgr 2103 introduces integration between the Software Update Point and Task Sequences. Below we will step through how to configure this.
There is no change to the user experience whether you use an upgrade Task Sequence based on an OS image (wim) or Feature Update (esd) file.
Pre-requisites
- A Software Update Point must be configured in the Configuration Manager environment.
- The SUP must be configured to download the Upgrade classification for the product Windows 10, version 1903 and later.
- The SUP must be syncing the same language updates as the workstations that will be targeted for upgrade.
Basic Upgrade Task Sequence
The first thing you may think is that we can simply create a new task Sequence and select a new option in the wizard. Nope, sorry!
We must create a custom Task Sequence and add an upgrade step (or modify an upgrade template from the wizard but more on that later). To do this, open the ConfigMgr console:
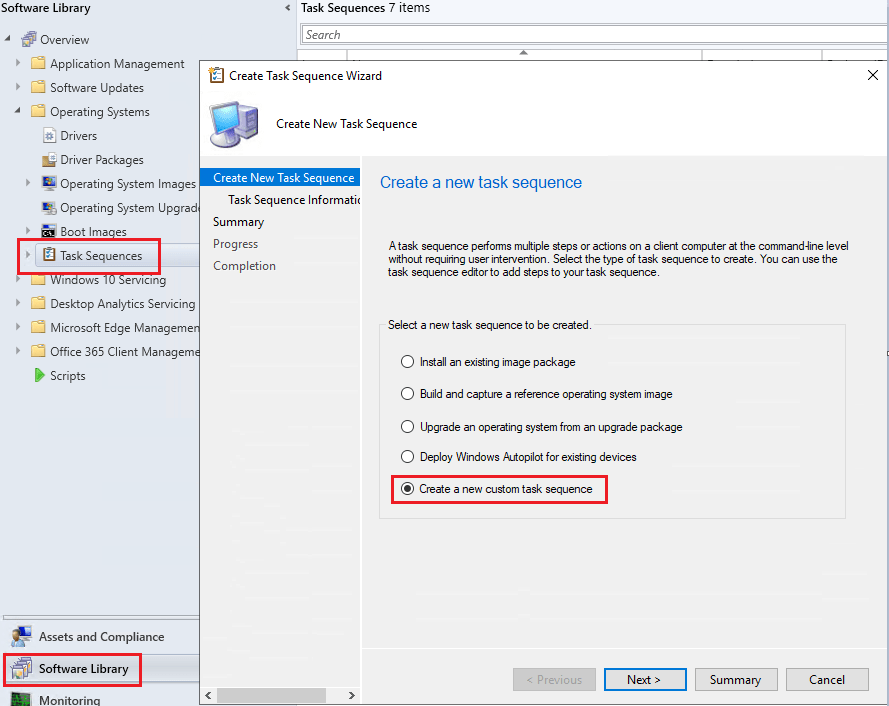
Go to Software Library > Operating Systems > Task Sequences > Right click Task Sequences and select Create Task Sequence.
Select Create a new custom task sequence
Give the Task Sequence a Name. Do not attach a Boot image. Optionally select Run as high performance power plan.
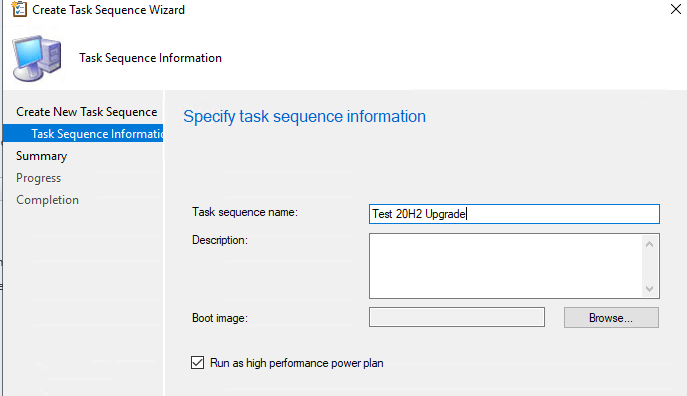
Next to create the empty Task Sequence.
Navigate to the new Task Sequence and edit it to open the editor.
Select Add > Images > Upgrade Operating System

On the right, select Install the following feature updates and click the sun symbol.
Expand Classifications > Upgrades > Microsoft > Windows 10, version 1903 and later
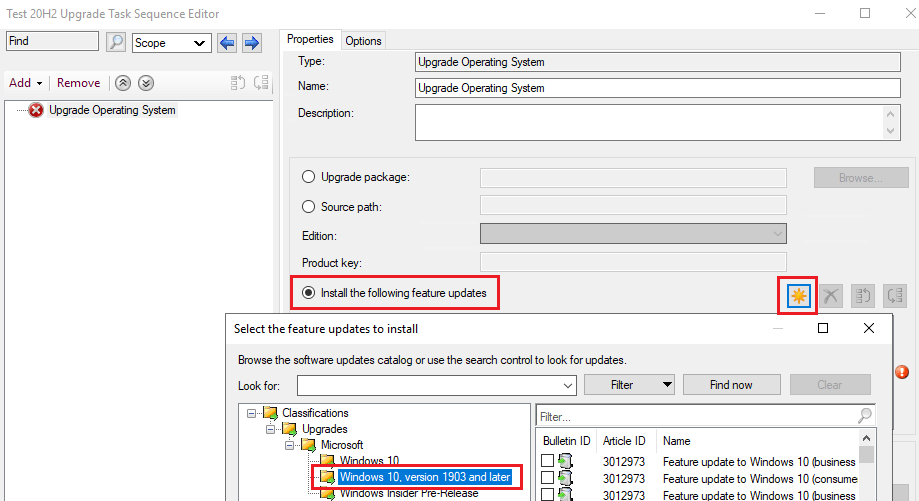
Select the version and language you wish to deploy. In this instance it is business editions, 20H2 en-gb x64.

Next go to Add > General > Restart Computer
On the right under Specify what to run after restart: select The currently installed default operating system.

Select OK. That is the all we need to create a basic Task Sequence that will upgrade Windows 10 to 20H2.
This post will not cover all the steps of deploying a Task Sequence except to highlight that when you deploy the new Task Sequence you will find an additional item in the wizard called Deployment Package.

If you have deployed Software Updates from ConfigMgr then you will be familiar with this tab. This appears because we are making use of ConfigMgr’s Windows 10 Servicing components. Here we select which Deployment Package we want to download the update to or we can create a new one.
Note: If you have already downloaded the Feature Update to a Deployment Package then you are not presented with the Deployment Package tab in the wizard.
At the bottom you can select not to use a Deployment Package. Doing this means the client will use peers (if configured in the environment) or the internet based Windows Update service to download the Feature Update file. VPN clients with split tunnels for internet access may be a good target for such a configuration.
Testing the Deployment
In the lab we have a Windows 10 1909 Enterprise x64 client that I have deployed a 20H2 Task Sequence upgrade to as an Available deployment. I selected the option for no deployment package so that the client downloads the update from the internet.
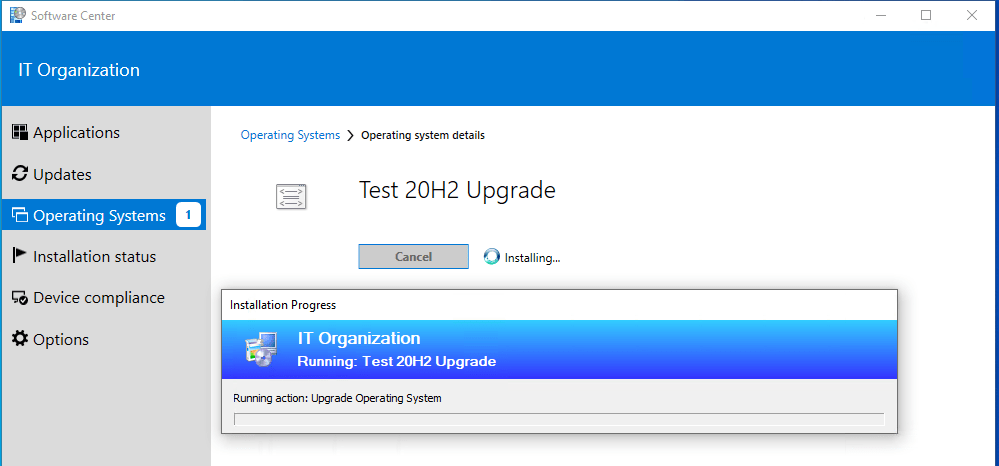
In Software Center we see the Task Sequence.

We select to install. The Task Sequence runs just like a normal upgrade Task Sequence.
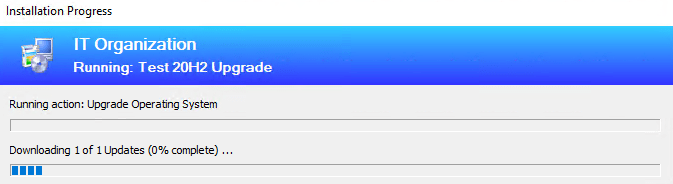
In the client’s ContentTransferManager.log we see the below line confirming that it has started downloading the .esd Feature Update file from Microsoft.
- CTM job {FCD2985A-049C-41A7-9649-04B77303958B} (corresponding DTS job {83A918CA-C384-418C-83D0-8C85E972B77E}) started download from ‘http://b1.download.windowsupdate.com/c/upgr/2020/12/19042.631.201119-0144.20h2_release_svc_refresh_clientbusiness_vol_x64fre_en-gb_3c905ec1d5805330978403241fbedecd0d89845a.esd’ for full content download

The .esd file is ~3.8GB. This is 30% less than the 5.5GB image we would have had to use in the old Task Sequence upgrade method.
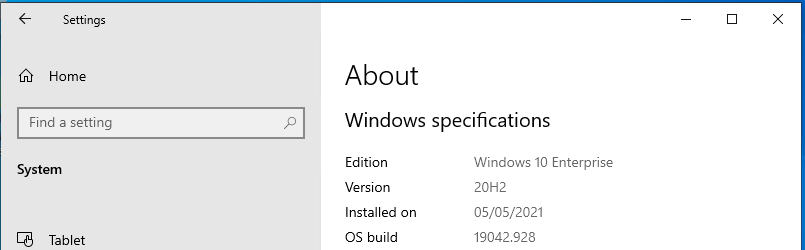
After the install the device restarted as part of the Task Sequence steps we configured. We now see version 20H2 is now running on the device.
Advanced Task Sequence
A more realistic Task Sequence for upgrade has a number of pre and post actions. This new way of delivering the .esd file can be piggybacked on to the template that Microsoft provide.
To do this you must already have an Operating System Upgrade image saved in ConfigMgr. It can be for any Feature Update version as we only need it to complete the wizard as you will see below.
Go to Software Library > Operating Systems > Task Sequences > Right click Task Sequences and select Create Task Sequence > Upgrade an operating system from an upgrade package

Give the Task Sequence a Name. Optionally select Run as high performance power plan.
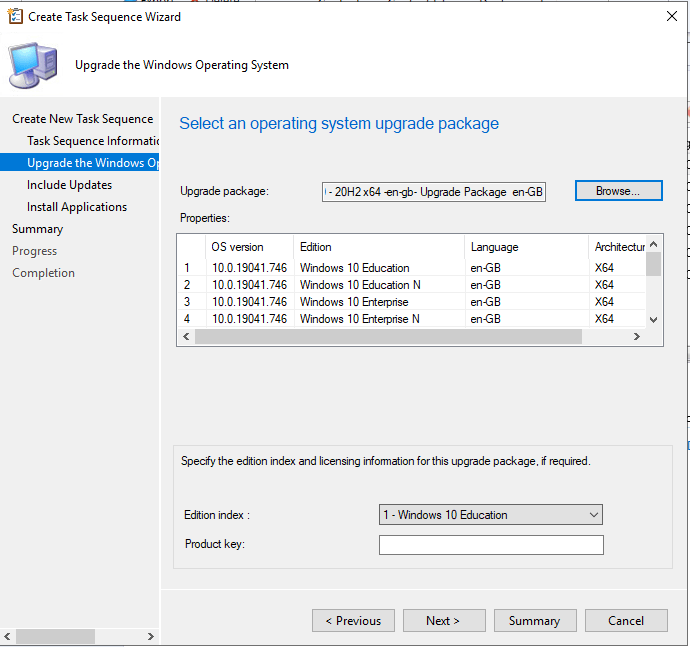
On the Upgrade Package tab, select any Upgrade Package that is already in the environment. Don’t worry about the Edition index, just select Next.
Next all the way through and create the Task Sequence. Once created, edit the Task Sequence to display the editor.
Select the Upgrade Operating System step and change it to Install the following feature updates and click the sun symbol.
Expand Classifications > Upgrades > Microsoft > Windows 10, version 1903 and later
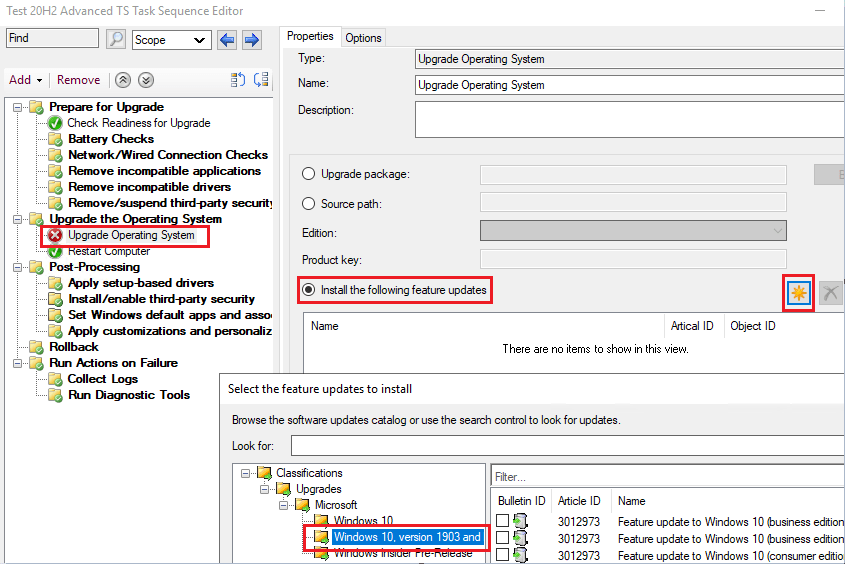
Select the version and language you wish to deploy. In this instance it is business editions, 20H2 en-gb x64.
Now we have an advanced template to build out all the steps we need.

Summary
The integration of Windows 10 Servicing components presents options for reducing the overall footprint of Feature Updates on a network. Previously, to reduce this required separating the advanced capabilities of Task Sequences from the actual upgrade delivered by Windows 10 Servicing.
Clients can now connect directly to Windows Update to download the Feature Update file for a Task Sequence upgrade rather than rely on the Distribution Points or a CDP enabled Cloud Management Gateway (the latter of which can incur costs).