Windows Sandbox – Once you boot it, you’ll not want to lose it

In this post I will cover what Windows Sandbox is, why it is still a valuable tool and how to get started with it.

Overview

I’ve been speaking to a number of IT professionals and many have either never used Windows Sandbox or even heard of it.

Microsoft introduced the Windows Sandbox feature in Windows 10 1903, so it has been around for quite a while. Microsoft sought to overcome the issue of how you quickly test software on a device without the need to buy a second workstation or deploy Virtual Machines.

  • Windows Sandbox is a Virtual Machine with a twist.
  • When it boots it creates a a sandboxed Windows environment.
  • It securely reads many of the host’s system files to support the VM.
  • When you shut it down, it destroys itself. Leaving nothing behind.
  • You can copy and paste to it and it has internet access by default.

In the most recent Windows 11 builds, you can now restart the Sandbox and it will retain its state. Shutting it down still destroys the VM.

This makes it an ideal tool for quick test and dev work.

Prerequisites

  • Windows 10 Pro, Enterprise or Education build 18305 or Windows 11 (Windows Sandbox is currently not supported on Windows Home edition)
  • AMD64 or (as of Windows 11 Build 22483) ARM64 architecture
  • Virtualization capabilities enabled in BIOS
  • At least 4 GB of RAM (8 GB recommended)
  • At least 1 GB of free disk space (SSD recommended)
  • At least two CPU cores (four cores with hyperthreading recommended)

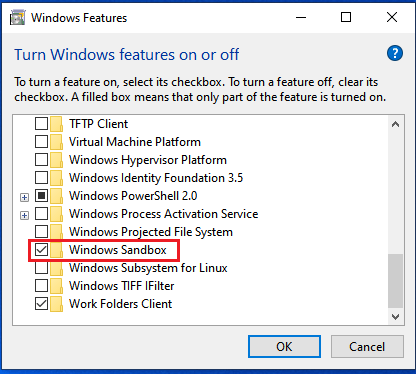
How to Enable Windows Sandbox

A simple tick box is all that is needed!

  1. From the Windows desktop, select Start and type “features
  2. From the results, select Turn Windows features on or off.
  3. Scroll to the bottom of the Windows Features window and tick Windows Sandbox.
  4. When prompted, restart the device.

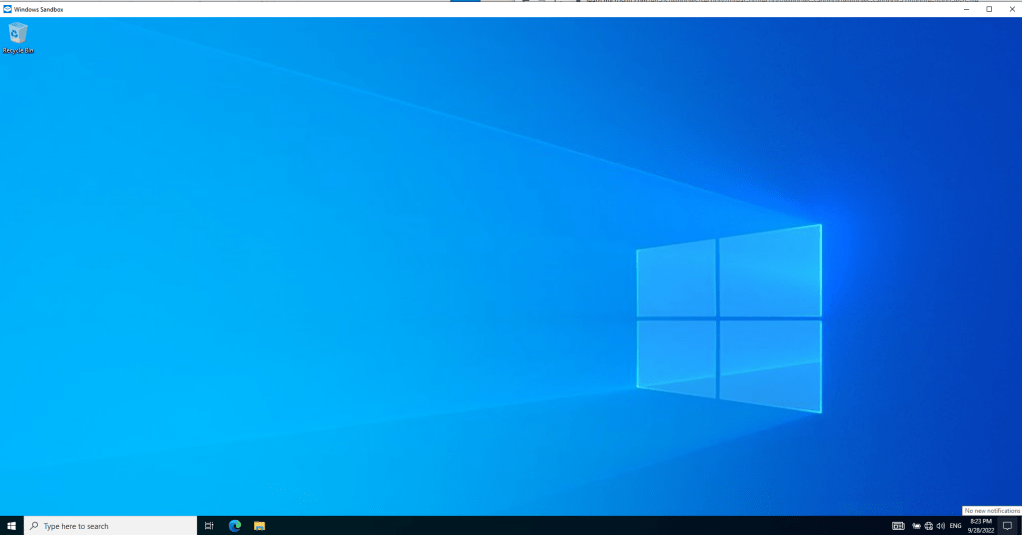
Explore Windows Sandbox

Once enabled and following the restart, you can now find Windows Sandbox in the Start Menu.

Clicking it will launch a brand new virtual machine running Windows. There is no need to login and you already have admin rights.

Out of the box you can:

  • Browse the internet (keep in mind, you can also browse the local network!)
  • Copy and Paste through the console
  • Run Powershell and Powershell ISE consoles
  • Install software

You cannot:

  • Update Windows
  • Make any persistent changes
  • Turn Windows features on or off
  • Browse the Microsoft Store
  • Add additional disks to compliment the 40GB system disk.

Note: The VM shares some system files with the host Operating System. Although the Settings app may show an older feature update of Windows in use (in Windows 10 it says 2004), in fact it is running whichever feature update version you currently have. See point number 2 in the comment below from Paul Bozzay, a Microsoft developer familiar with Windows Sandbox:

Customising Windows Sandbox

It is possible to control the following elements of the Sandbox by using a configuration file:

  • vGPU (virtualized GPU)
  • Networking
  • Mapped folders
  • Logon command
  • Audio input
  • Video input
  • Protected client
  • Printer redirection
  • Clipboard redirection
  • Memory in MB

Let’s look at how to do two common ones. We are going to:

  1. Disable network access
  2. Increase the RAM

Open Notepad and paste in the below fairly self explanatory four lines of XML code:

<Configuration>
 <Networking>Disable</Networking>
 <MemoryInMB>8192</MemoryInMB>
</Configuration>

Save the file with a name of your choice and with the file extension .wsb

For example: Sandbox-8GB-NoNetworking.wsb

You will notice that the file icon will change to the Windows Sandbox icon as long as Windows Sandbox has been enabled.

Open the file to boot a Windows Sandbox VM with 8GB memory and networking disabled.

To close it, select the X at the top right or shut down the VM via the Start Menu within the VM itself.

Conclusion

Windows Sandbox provides a fast way to test software and is easy to set up. One draw back is that in the Windows 10 version, you cannot test software that requires a restart because restarting will destroy the state of the VM. You can overcome this by using Windows 11’s Windows Sandbox implementation.

If you are using it to test untrusted files then it is important that you understand how the VM interacts with the host Operating System. I recommend reading the Windows Sandbox architecture deep dive from Microsoft here:

To make use of all the available customisations, check out the Microsoft documentation here:

How-to: Renew Apple Push Notification Certificate in Microsoft Intune

In this post I will cover:

  • Why Microsoft Intune uses an Apple Push Notification Certificate
  • Key points of APN certificate management in Intune
  • Checking if the APN certificate is expired
  • How to Renew an APN certificate in Microsoft Intune

Note: This post assumes that you already have Intune configured with an Apple Push Notification certificate and are managing Apple devices via Intune MDM.

What is an APN certificate used for?

An Apple Push Notification certificate is issued by Apple and is used by a Mobile Device Management system to authenticate itself to the Apple devices that it manages. In the case of Microsoft Intune, it sends the APN certificate to the Apple device and the Apple device, such as an iPhone, validates the certificate before accepting management messages from Intune.

Key points of APNC management in Intune

  1. If the APN certificate expires and the grace period of 30 days passes then ALL of the Apple devices managed by Intune MDM will stop accepting management tasks from Intune. If this happens then all devices will need to be re-enrolled in Intune. This is a difficult task for a large organisation!
  2. When an APN certificate is due to expire you must always renew the certificate and not create a new one. Using a brand new certificate will break the trust between your existing Apple devices and Intune. If you accidentally do this, you can revisit the Apple portal and renew the expiring certificate. Loading that in to Intune should restore service for the existing Apple devices.
  3. Your APN certificate is tied to the Apple ID that was used to create it. If you do not have access to this Apple ID (such as it was created in the name of a former employee) then start taking steps now to gain access! One workaround is to contact Apple Developer Program Support with the certificate details and they will be able to migrate the certificate to another Apple ID.
  4. Once a renewed APN certificate is loaded in to Intune, all Apple devices will seamlessly transition to accepting the new certificate. There are no device side changes required

Where to find your APN certificate expiry date

It is extremely important to be aware of when your APN certificate is due to expire for the reasons mentioned above.

  1. In the Endpoint Manager portal https://aka.ms/dmac > Devices > Enroll devices > Apple enrollment > Apple MDM Push certificate
  2. On this page you will see which Apple ID the created the certificate as well as the expiry date.

If your APN certificate has already expired then you will see the following alert on the Home > Connector status tab of the Endpoint Manager portal as seen below:

How to renew an APN certificate in Microsoft Intune

  1. In the Endpoint Manager portal https://aka.ms/dmac > Devices > Enroll devices > Apple enrollment > Apple MDM Push certificate.
  2. The lower section of the page allows you to renew your certificate. Select Download your CSR.
  3. A file called IntuneCSR.csr will be downloaded.
  1. Select Create your MDM push Certificate > Login to the Apple portal that opens with the same Apple ID as was used to create the soon to expire APN certificate.
  2. Select Renew next to the certificate. DO NOT select Create new certificate!
  1. Select Choose file > upload the IntuneCSR.csr file > select Upload
  1. Select Download to download the new certificate.
  2. A file called MDM_Microsoft_Corporation_Certificate.pem will be downloaded.
  3. Back on the Intune portal, enter the Apple ID used to create the Apple certificate > Upload the .pem file.
  1. Once Intune validates the certificate it will show as Active with a green tick at the top of the page. There are no devices side actions required.

Summary

The Apple Push Notification certificate enhances the security of Intune MDM. Maintaining it is often overlooked because it is easy to set up and normally created as part wider project to migrate to Intune with many moving parts.

It is essential however to stay ahead of expiry and failing to do so can have a huge impact on device management. It should be treated like any other certificate maintenance plan. Key tasks are:

  • The Apple ID credentials are recorded and stored securely.
  • The expiration date is entered in to a calendar that can alert IT staff.
  • The steps to renew the certificate are recorded in a knowledgebase.